Building a roster
The builder is where lineups actually get made: a live control panel plus a roster display that update as you place players clan by clan. You reach it from Build on the roster dashboard.
Starting a build
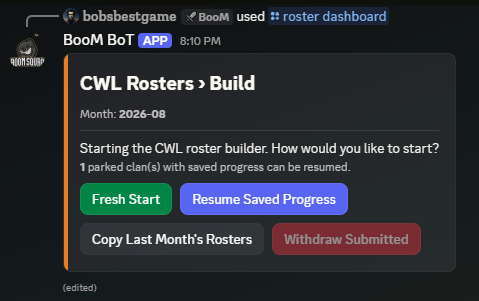
When you start, you choose which of your linked clans are in this month's CWL and how the build begins:
- Fresh start — empty rosters.
- Copy last month — last month's finalized rosters as your starting point. Every copied player is vetting-checked; anyone who now trips a serious warning is set aside pending your explicit confirmation (see Vetting warnings).
- Resume — pick up saved progress exactly where you left it.
Your build claims the clans you selected, so two leaders can build different clans in parallel without stepping on each other.
The panel
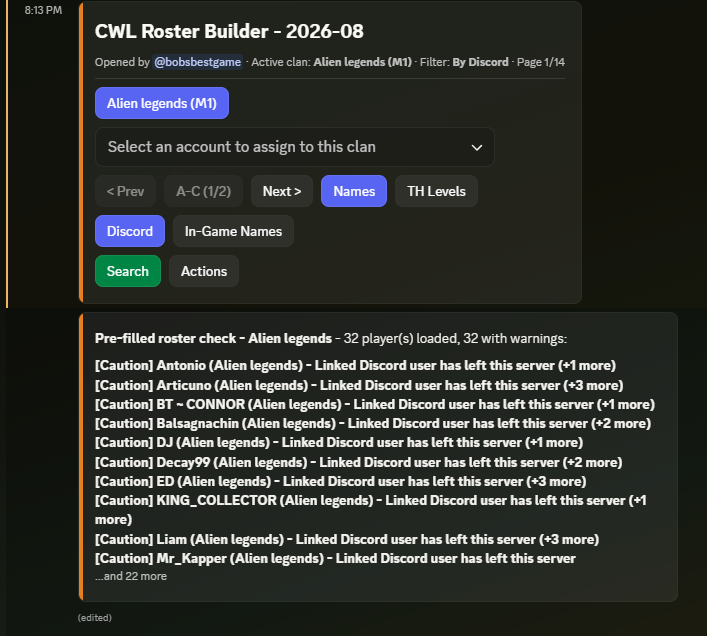
From top to bottom:
- Clan tabs — one per clan in your build; the active tab is the clan you are placing players into. The roster display above the panel follows along.
- Account select — the pool of available accounts. Signed-up players surface here; each entry shows town hall and owner.
- Navigation and view controls — page through the pool, and toggle between name sorting (Discord or in-game) and a town-hall filter (TH18 down to "TH11 or less").
- Search / Actions / Close Session — the working buttons, covered below.
Adding is one interaction: pick an account from the select and it lands on the active clan's roster. Go over the clan's size cap and the bot asks whether the player should be a substitute instead.
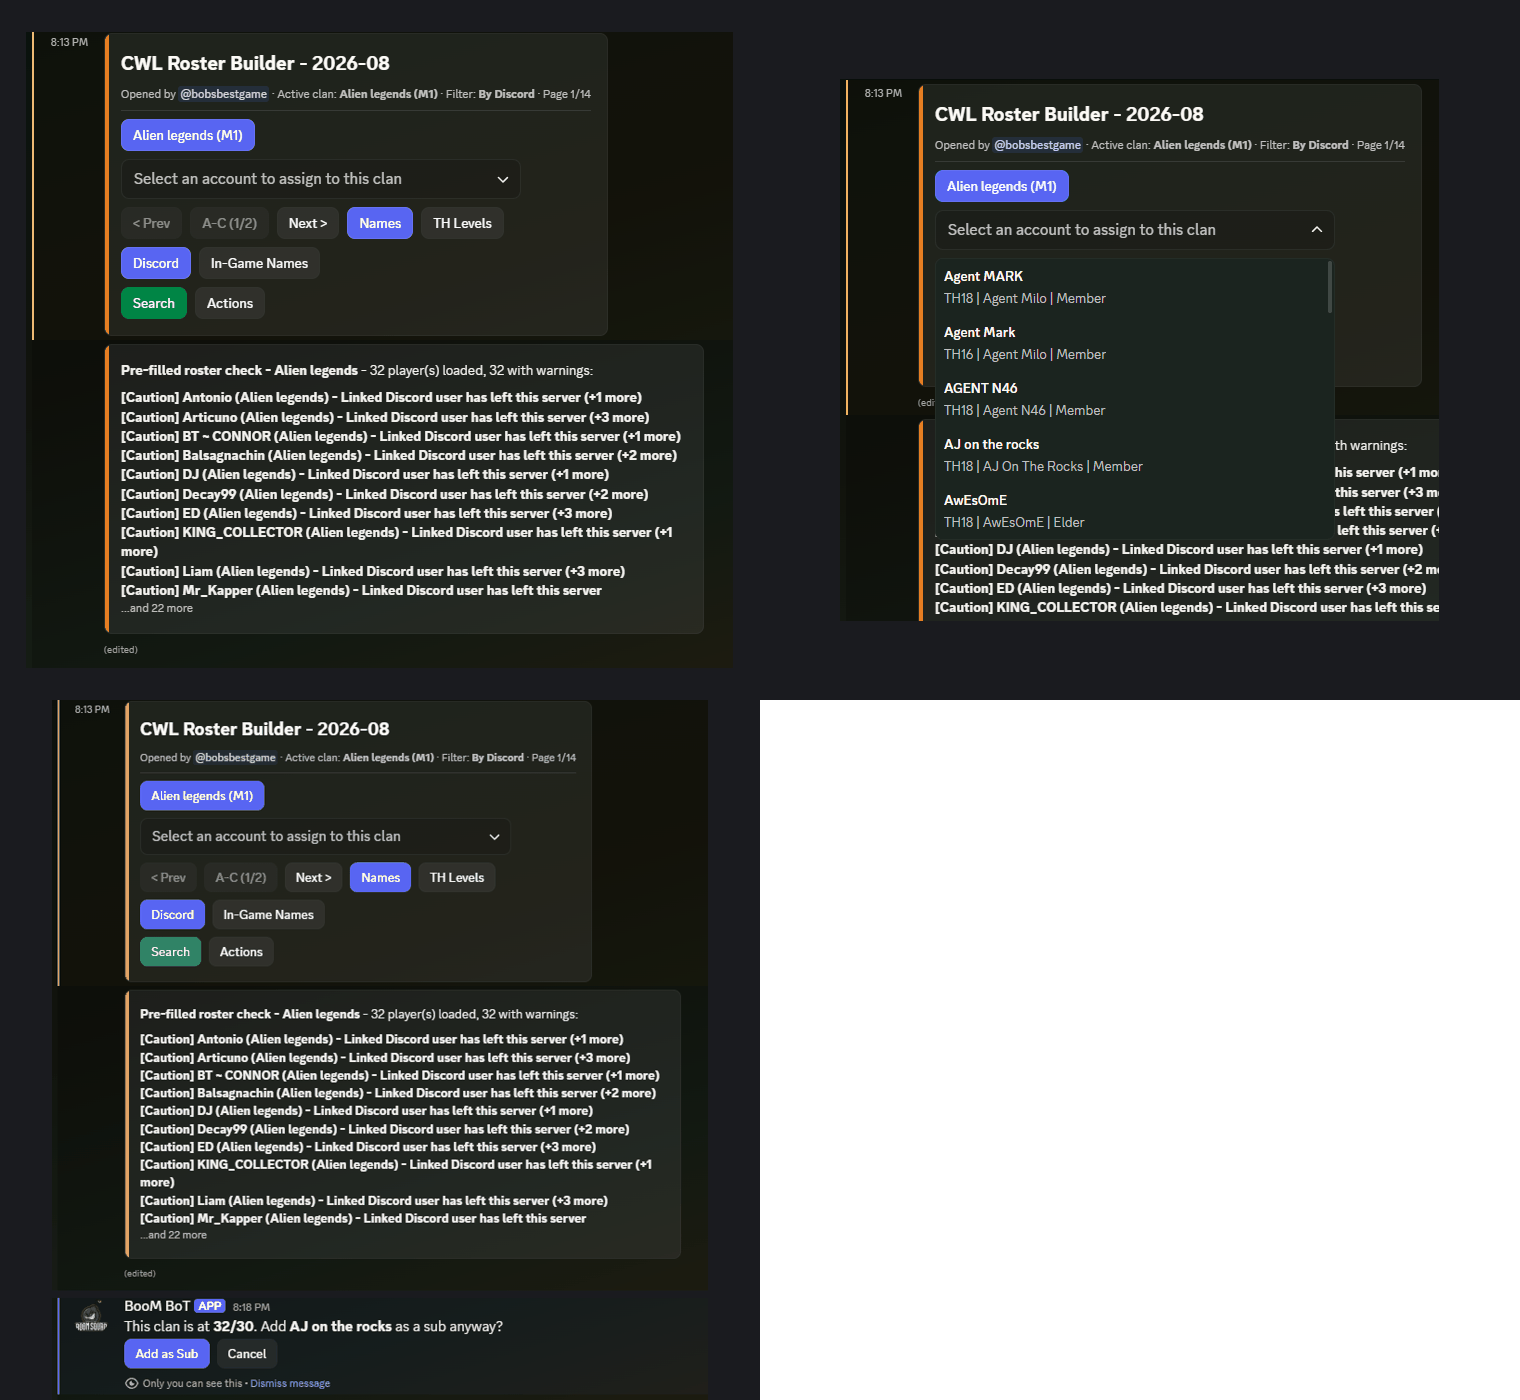
Search
Search replaces scrolling with typing: enter part of a name (in-game or Discord) and the panel becomes a results screen. A single match is added immediately; multiple matches give you a pick list. Back to Builder (on this and every other screen) returns to the panel.
The Actions menu
Actions opens a menu on the panel itself with everything beyond simple adds:
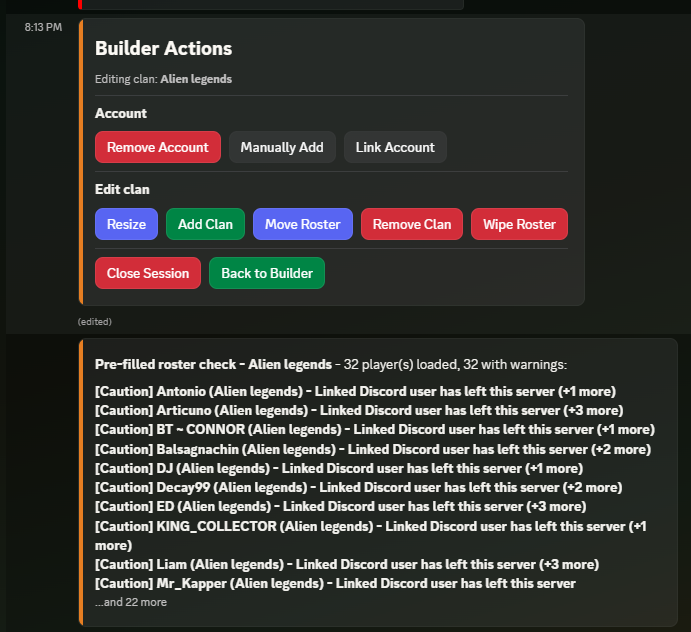
- Remove Account — take someone off the active clan's roster.
- Manually Add — add a player who isn't in the pool. With a tag, the game API fills in the real name and town hall; without one, you can enter a placeholder by name.
- Link Account — link an unlinked account to a Discord user without leaving the builder.
- Resize — change the active clan's roster size (15 or 30).
- Add Clan / Remove Clan — change which clans are part of this build mid-session.
- Move Roster — pour the active clan's entire lineup into another clan in the build; overflow becomes substitutes. Handy when league placements shuffle your plans.
- Wipe Roster — clear the active clan and start it over.
Vetting while you work
Below the panel sits the vetting message. Every add is checked against the player's history, and anything noteworthy appears there — most warnings are advisory, while the serious tier holds the add until you press Add anyway or Cancel. The full story is on Vetting warnings.
Closing a session
Close Session (inside Actions) offers three exits:
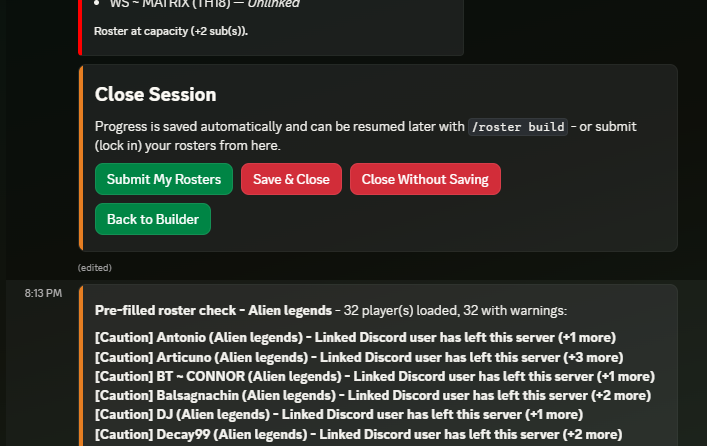
- Save & Close — park your progress; resume it any time from the dashboard.
- Close Without Saving — revert to your last save.
- Submit My Rosters — lock your clans in as done and hand them to the publishing flow.